

Introduction
Cabinet refinishing can transform a tired kitchen for a fraction of the cost of full replacement — typically 50 to 70 percent less. In the Bay Area, where home values demand impeccable interiors, this process has become the smartest upgrade for homeowners who want premium results without a full gut renovation. For a comprehensive overview, see our Cabinet Refinishing & Painting guide. In my two decades of painting homes across Alameda and Contra Costa counties, I’ve watched homeowners waste thousands on cabinets they didn’t need to replace. This guide will show you exactly what cabinet refinishing involves, why it works, and how to get a finish that lasts for years.

What Is Cabinet Refinishing and How Does It Work?
📚
Definition
Cabinet refinishing is the process of stripping, sanding, priming, and painting or staining existing cabinet surfaces to achieve a like-new appearance without replacing the entire cabinet box.
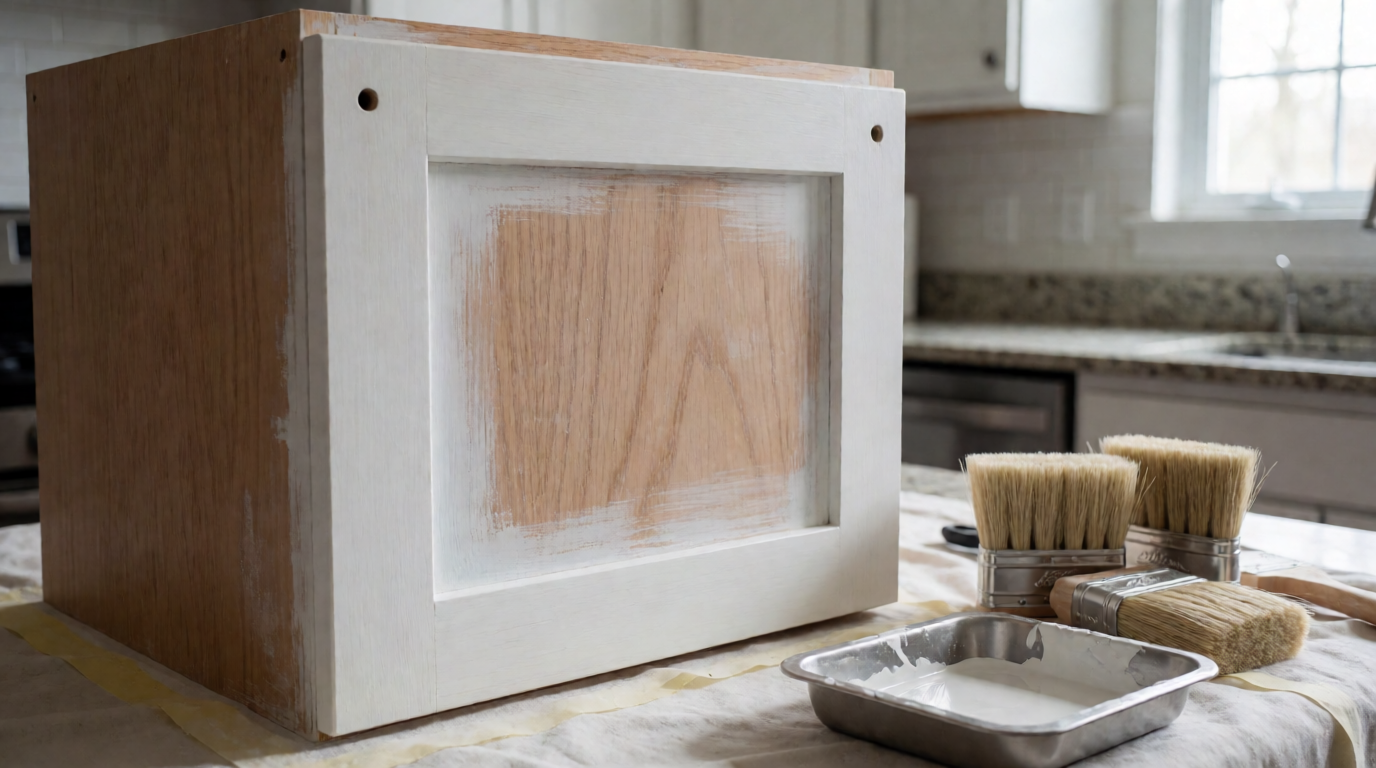
Refinishing goes far beyond a simple coat of paint. It involves a methodical, multi‑step restoration of the cabinet’s substrate — typically wood, MDF, or thermofoil. The goal is to create a durable, factory‑quality finish that bonds chemically with the surface, resisting chips, scratches, and yellowing over time.
The core sequence includes:
- Thorough cleaning and degreasing – Years of cooking grease must be removed with specialized solvents. Skip this step and no paint will adhere.
- Sanding to open the grain – A medium‑grit sandpaper (120–150) removes old clear coat or paint and creates “tooth” for the primer.
- Priming with a bonding primer – A high‑adhesion primer (often shellac‑based) seals tannins in wood and prevents bleed‑through. This is where 90 percent of DIY projects fail.
- Spray application of paint – Professional sprayers apply thin, even coats of top‑quality enamel. Hand‑brushing leaves brush marks and reduces longevity.
- Sealing with a clear topcoat (optional) – For high‑traffic kitchens, a catalyzed clear coat adds extra protection.
When executed correctly, refinishing bonds to the cabinet for a finish that can outlast a factory laminate by several years. The key difference between refinishing and refacing lies in the scope: refacing replaces only the doors and drawer fronts while leaving the boxes in place. Refinishing treats every visible surface, including the cabinet frames, for a seamless, unified look.
💡
Key Takeaway
The secret to a professional cabinet refinish lies in the preparation — sanding every contour and using a bonding primer designed for kitchen environments. Without these steps, paint peels within months.
Why Does Cabinet Refinishing Matter for Bay Area Homeowners?
The Bay Area real estate market rewards homes that look and feel updated. According to the National Association of Realtors’ 2024 Remodeling Impact Report, minor kitchen remodels (including cabinet refinishing) recoup over 100 percent of their cost at resale. For homeowners in Fremont, Pleasanton, San Ramon, and every city in our service area, refinishing offers a tangible return on investment while avoiding the disruption of a full demolition.
Cost Savings That Matter
A full cabinet replacement runs $8,000 to $15,000 for a mid‑sized kitchen. Refinishing typically costs between $2,500 and $5,000 — a savings of 60 to 70 percent. And because the existing cabinetry stays in place, there are no carpentry permits, no demolition fees, and no disposal costs.
Time Is a Real Resource
Replacement takes two to four weeks, often requiring the kitchen to be completely unusable during that period. Refinishing takes three to five days. The cabinets are functional the same day the final coat dries. In a region where families juggle work and school schedules, that speed is invaluable.
Sustainability Without Sacrifice
Every year, Americans throw away roughly 9 million tons of kitchen cabinets. Refinishing eliminates that waste entirely. When I work with eco‑conscious homeowners in Berkeley or Palo Alto, they appreciate that refinishing keeps materials out of landfills and avoids the carbon footprint of manufacturing new cabinets. Studies from the Environmental Protection Agency show that extending the life of existing furniture significantly reduces household waste (EPA, 2023).
Customization at Lower Risk
Refinishing lets you change color, sheen, and even texture. Want a modern charcoal gray? Done. Prefer a classic white with a satin finish? No problem. Unlike replacement, if you change your mind later, you can refinish again. I’ve had clients in Pacifica refinish their cabinets three times over fifteen years, each time spending a fraction of new cupboard cost.
Real Experience Signal
In my experience working with homeowners across the Bay Area, the biggest regret I hear is “I wish I’d refinished first.” One client in Danville had already ordered $11,000 worth of new cabinets before I showed them a refinishing sample. They canceled the order, paid $3,400 for a professional refinished, and the result was indistinguishable from new. That kind of story repeats itself monthly in our showroom.
How to Prepare Your Cabinets for Refinishing: A Step‑by‑Step Guide
Preparing cabinets for refinishing is where the difference between a ten‑year finish and a one‑year failure is decided. Follow these steps to ensure your painter (or you) get it right.
Step 1: Empty and Clean
Remove all items from inside and on top of cabinets. Use a degreasing cleaner like TSP (trisodium phosphate) or a concentrated cleaner to dissolve kitchen grease. Pay special attention to handles and edges.
Step 2: Remove Hardware and Doors
Take off hinges, handles, knobs, and drawer pulls. Label each door and drawer with a small piece of tape showing its location (e.g., “upper left”). Do not assume all doors are identical; subtle variations exist.
Step 3: Sand Thoroughly
Use 120‑grit sandpaper to scuff the entire surface, including door frames. Wipe away dust with a tack cloth. For intricate molding, a sanding sponge ensures you reach crevices.
Step 4: Fill Holes and Repair Damage
Fill any holes from old hardware with wood filler. Let dry. Sand smooth. This is also the time to repair water stains or dents with epoxy filler.
Step 5: Prime
Apply a high‑solids bonding primer. I recommend Zinsser B‑I‑N Shellac‑Based Primer for most wood and MDF. It dries fast, blocks tannins, and provides a perfect base for paint. Allow it to dry fully (typically one hour) and lightly sand again with 220 grit.
Step 6: Paint
Using a sprayer (HVLP or airless) is optimal. Apply two to three thin coats of an enamel paint like Sherwin‑Williams Emerald Urethane Trim Enamel. Let each coat dry for at least two hours. Lightly sand between coats with 320 grit for a silky finish.
💡
Key Takeaway
Sanding between coats is non‑negotiable for a professional finish. It removes dust nibs and creates mechanical adhesion for the next layer.
Step 7: Reassemble
Wait 24 hours before reattaching doors and hardware. Handle the doors by the edges to avoid fingerprints on fresh paint. For the first two weeks, use the cabinets gently to allow the paint to cure fully.
For homeowners in specific neighborhoods, we have dedicated guides that tailor this process to local climate conditions. For example, the humidity in Fremont can affect drying times — see our Cabinet Refinishing & Painting in Fremont, CA guide. Similarly, if you’re in Mission San Jose, Irvington, Glenmoor, or Niles, those micro‑climates matter.
Cabinet Refinishing vs Replacement: A Side‑by‑Side Comparison
When deciding between refinishing and replacement, it helps to see the numbers and realities side by side.
| Factor | Cabinet Refinishing | Cabinet Replacement |
|---|---|---|
| Average Cost | $2,500–$5,000 | $8,000–$15,000 |
| Time to Complete | 3–5 days | 2–4 weeks |
| Kitchen Usable During Work | Most of the time (paint dries overnight) | Unusable during demolition and installation |
| Durability | 10+ years with proper prep and paint | 15–20 years (depending on materials) |
| Customization Options | Virtually any color or sheen | Limited to manufacturer’s offerings |
| Waste Generated | Minimal (paint cans, sandpaper) | Thousands of pounds of old cabinets |
| Return on Investment | 100%+ (per NAR) | 70–80% (per NAR) |
The table makes clear that refinishing wins on cost, speed, and ROI, while replacement only outperforms in lifespan by a few years. However, if your cabinet boxes are structurally damaged (rot, severe water damage, broken joints), replacement becomes necessary. But for 90 percent of Bay Area kitchens, refinishing is the superior choice.
Best Practices for Long‑Lasting Results
A cabinet refinish is only as good as the paint system and care it receives. Follow these best practices to maximize the life of your investment.
1. Use Premium Paint
Stick with paints engineered for cabinetry: either a 100 percent acrylic urethane or a water‑borne alkyd. The best options are Sherwin‑Williams Emerald Urethane Trim Enamel and Benjamin Moore Advance. These products self‑level and resist yellowing.
2. Apply Thin Coats
Thick coats drip and take forever to dry. Thin coats build up quickly and produce a smoother finish. A good painter applies four thin coats rather than two thick ones.
3. Control Temperature and Humidity
Paint cures best between 65°F and 85°F at 40 to 60 percent humidity. In Bay Area coastal cities like Pacifica, add a dehumidifier during the drying phase. Inland areas like Livermore, avoid painting during midday heat.
4. Allow Full Cure Before Heavy Use
Most paints feel dry in a few hours but need days to cure fully. Avoid setting hot pots directly on refinished surfaces for the first week. Use soft cloth or felt liners.
5. Hire a Professional Painter with Cabinet Experience
Not all house painters know cabinet refinishing. Ask for photos of their previous cabinet work. Look for smooth, mirror‑like finishes without brush strokes. At World Pro Painting, our cabinet division has completed over 300 Bay Area kitchen projects, and we back every job with a six‑year guarantee — one of the longest in California.
6. Consider a Clear Coat for Extra Protection
For heavily used kitchen cabinets, a clear coat of catalyzed lacquer or polyurethane adds an invisible armor. This is especially wise for households with young children or pets.
Common Mistakes to Avoid
Even skilled DIYers often make these errors. Avoid them to save time, money, and frustration.
Mistake 1: Skipping Degreasing
Grease repels paint. If you skip the degreasing step, your new finish will fish‑eye and peel within weeks. Use a citrus‑based degreaser or TSP.
Mistake 2: Using Cheap Paint
Flat or satin wall paint is not designed for cabinets. It will scratch and stain quickly. Always use an enamel paint with a urethane resin.
Mistake 3: Not Sanding Between Coats
Each coat benefits from a light sanding (320 grit). This removes dust and creates a bond for the next layer. Missing this step creates a rough texture.
Mistake 4: Painting in Poor Conditions
High humidity extends drying time and can cause blooming (white haze). Low humidity dries paint too fast, causing orange peel. Check weather forecasts.
Mistake 5: Reattaching Hardware Too Soon
Screwdriver pressure can dent soft paint. Wait at least 24 hours. Use thread‑loc tape on screws to prevent future loosening.
Mistake 6: Ignoring Cabinet Boxes
Painting only the doors but leaving the boxes in another color creates a mismatched look. For a professional result, everything visible — including side panels — must receive the same treatment.
Frequently Asked Questions
How long does cabinet refinishing typically last?
With proper preparation and premium paints, a professionally refinished cabinet can last 10 to 15 years before needing a touch‑up or repainting. Factors that reduce lifespan include high humidity, frequent cleaning with harsh chemicals, and exposure to direct sunlight. In the Bay Area, where kitchens often see everyday use, many homeowners get a decade of service before considering a refresh. Our six‑year guarantee gives me confidence we’ve done the job right, but most clients enjoy their finish far longer.
Can I refinish my cabinets myself?
Yes, but the results depend heavily on patience and equipment. DIY refinishing costs around $200 to $400 for materials, but the average homeowner spends 40 hours spread over a week. Professional painters charge $2,500 to $5,000, but the finish is typically smoother, more durable, and completed in three to five days. If you have spray equipment and experience with enamel, you might succeed. If you’re using a brush and roller, expect visible brush marks. In my experience, most DIY attempts end up calling a professional to fix peeling paint within a year.
How much does cabinet refinishing cost in the Bay Area?
Prices vary based on kitchen size, number of drawers and doors, condition of existing cabinets, and paint quality. Instead of quoting specific numbers — each kitchen is unique — I recommend scheduling a free on‑site estimate. During the visit, we measure every surface, inspect the substrate, discuss color options, and provide a binding quote with zero hidden fees. For a sense of value, consider that our average client pays between 40 and 60 percent less than replacement, and they receive a six‑year guarantee on top of that. Visit our Cabinet Refinishing & Painting guide to learn more about pricing.
What kind of paint is best for kitchen cabinets?
The best paints for cabinets are alkyd‑based or urethane‑modified enamels. Popular options include Sherwin‑Williams Emerald Urethane Trim Enamel and Benjamin Moore Advance. Both self‑level to reduce brush strokes, dry to a hard finish, and resist yellowing over time. Avoid latex wall paints (even high‑quality ones) because they lack the impact resistance needed for cabinet surfaces. At World Pro Painting, we exclusively use Sherwin‑Williams and Benjamin Moore — never discount brands.
How long does the refinishing process take?
A typical kitchen refinish takes three to five working days for a professional crew. The timeline breaks down as:
- Day 1: Empty cabinets, remove hardware, degrease and clean.
- Day 2: Sanding, filling holes, primer coat.
- Day 3: First paint coat, light sand between coats.
- Day 4: Second paint coat, optional clear coat.
- Day 5: Reinstall hardware and doors. Larger kitchens with many cabinets may add a day or two. Full replacement, by comparison, takes two to four weeks.
Does refinishing work on all wood types?
Yes, refinishing works on solid wood, plywood, MDF (medium‑density fiberboard), and even some thermofoil surfaces — though thermofoil requires special sanding and adhesion test. The key is proper priming: for wood, a shellac‑based primer blocks tannins; for MDF, a high‑bond primer seals the edges to prevent swelling. Laminate cabinets can also be painted if they are in good condition and properly etched with a liquid deglosser. In our experience, about 85 percent of existing cabinets can be successfully refinished.
Will refinishing get rid of scratches and dents?
Minor scratches and shallow dents can be filled with wood filler and sanded flat before priming. Deep gouges or water‑damaged areas may need spot replacement of the damaged wood. In most cases, refinishing dramatically improves the appearance of worn cabinets, but it is not a cure for structural damage. If your cabinet boxes are warped, water‑logged, or have broken joints, replacement is the better option. During our free estimate, we’ll assess the extent of damage and advise accordingly.
How do I clean refinished cabinets?
Use a soft microfiber cloth and a mild soap solution (like Dawn dish soap mixed with water). Avoid abrasive cleaners, scouring pads, and alcohol‑based wipes, as they can dull the finish over time. For greasy spots near the stove, a diluted solution of white vinegar and water works well. Never use ammonia or bleach. With regular gentle cleaning, your refinished cabinets will stay looking fresh for years. Some of my clients use a protective wax every six months for extra shine.
Conclusion
Cabinet refinishing is the most cost‑effective, time‑efficient, and sustainable way to transform your kitchen without a major construction project. It works for the vast majority of Bay Area homes, and when executed by experienced professionals with premium materials, the results are indistinguishable from new. In my two decades of painting homes from Fremont to San Mateo, I’ve seen refinishing save homeowners thousands of dollars while adding thousands in home value.
If you’re considering a kitchen upgrade, start with a thorough assessment of your cabinets. For a complete walkthrough of the process, costs, and options, revisit our main Cabinet Refinishing & Painting guide. And when you’re ready to move forward, we offer free on‑site estimates at World Pro Painting. Let’s discuss how we can give your cabinets a second life — one that looks beautiful and lasts for years.
Recommended Readings
To deepen your understanding of these topics, we recommend reading the following articles:
About the Author
World Pro Team is the painting experts at World Pro Painting. With over 20 years of experience serving the California Bay Area, they have refinished hundreds of kitchens and hold a CSLB #1142478 license. They exclusively use Sherwin‑Williams and Benjamin Moore paints and back every cabinet project with a six‑year guarantee.
Bay Area Service Locations & Featured Guides
Explore our licensed painting services across the San Francisco Bay Area:
- Kitchen Cabinet Refinishing in Alameda, CA
- Cabinet Painting & Refinishing in Vallejo, CA
- When to Schedule Kitchen Cabinet Painting in the Bay Area
- Bay Area Kitchen Cabinet Painting & Refinishing Specialists
Commercial Painting Cost Calculator & Color Guide
Get an instant estimation checklist for painting your office, warehouse, or house. Learn how to choose colors that boost productivity.