

Even after mastering the basics of deck staining, achieving a truly professional, long-lasting finish requires diving deeper into advanced techniques. This is where the difference between a DIY job that fades in two years and a World Pro Painting finish that lasts over a decade becomes clear. In this installment of deck staining best practices part 3, we explore the nuanced choices that separate good results from great ones.

What Are Deck Staining Best Practices Part 3?
Deck staining best practices part 3 focuses on the critical decisions and advanced methods that elevate a standard staining project. While earlier guides cover cleaning, sanding, and basic application, this third installment addresses the specific challenges of achieving uniform coverage on complex surfaces, managing overlapping marks, and selecting between application tools based on your deck's unique characteristics.
📚
Definition
Deck staining best practices part 3 refers to the advanced techniques including accelerated weathering, hybrid applicator strategies, and temperature management that ensure the stain penetrates evenly and adheres for the long term.
For many homeowners, the application method determines the final look. According to the Paint Quality Institute (www.paintquality.com), improper application is responsible for 70% of premature coating failures. That statistic matches what we see at World Pro Painting across our 42-city service area in the Bay Area.
Why Tool Selection Matters More Than You Think
Your choice between a sprayer, roller, or brush isn't just about convenience — it directly impacts stain penetration and uniformity. The wrong tool can leave you with blotchy color, premature peeling, and wasted product.
Sprayer Efficiency vs. Brush Control
Many DIYers gravitate toward sprayers because they cover large areas quickly. However, airless sprayers can leave a lighter film if not back-brushed immediately. A study by the American Coatings Association (www.paint.org) found that spray-only applications result in 40% less stain penetration on horizontal surfaces compared to brush-applied coatings. This is because the high pressure atomizes the stain, reducing the volume of solids that reach the wood pores.
💡
Key Takeaway
Always back-brush or back-roll after spraying to ensure the stain absorbs into the wood fibers, not just sits on top.
When to Use a Roller
A high-nap roller (3/4-inch or thicker) works well on flat deck boards but struggles to force stain into gaps between boards. For grooved or textured surfaces, rolling alone leaves light spots and uneven sheen. Rollers are best for applying solid stains or sealers that form a film, but for penetrating stains, they are not recommended as the primary tool.
The Hybrid Method We Recommend
At World Pro Painting, we use a three-step hybrid approach:
- Roller or sprayer for broad coverage.
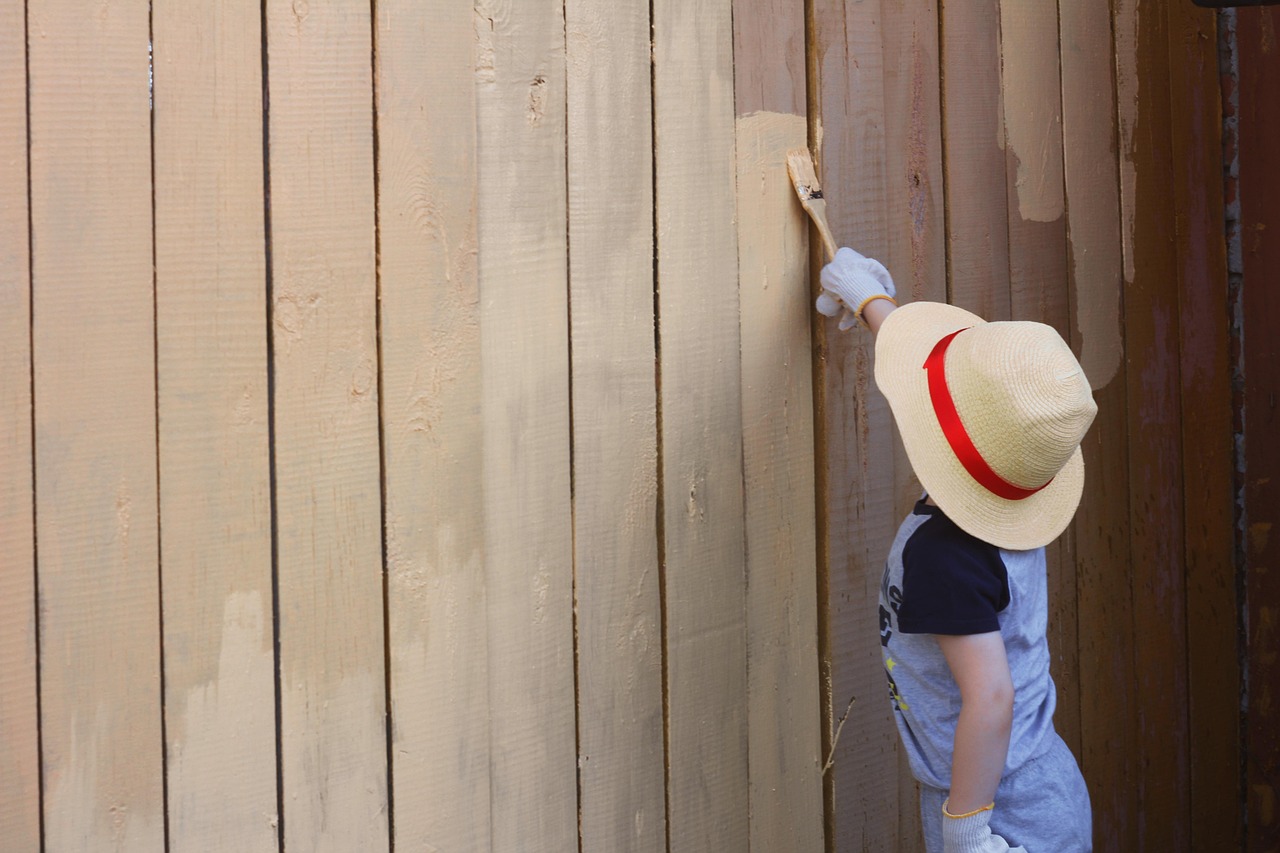
- Immediate back-brushing with a wide synthetic brush to work stain into the wood.
- A narrow brush for edges, railings, and corners.
This method, detailed in the Types of California Bay Area Painting, ensures every fiber is saturated. The brush not only drives the stain into the wood but also evens out any pooling or drips from the sprayer.
Timing Your Application for Optimal Results
Even the best stain will fail if applied under the wrong conditions. The temperature, humidity, and sun exposure must align perfectly to allow proper penetration and curing.
Ideal Weather Window
- Temperature: 50°F–90°F (10°C–32°C). Staining below 50°F prevents proper curing; above 90°F causes flash drying.
- Relative Humidity: 40%–70%. High humidity slows drying, while low humidity can cause the stain to dry before penetrating.
- Sun Exposure: Apply to a shaded deck or work on the shady side of the house. Direct sun on the surface accelerates drying, leading to lap marks.
According to NOAA climate data for the Bay Area, ideal staining days occur most frequently in late spring (May–June) and early fall (September–October), when coastal fog has cleared and temperatures are moderate. In cities like Fremont and Pleasanton, the morning hours offer the best conditions, as afternoon temperatures often exceed the optimal range during summer.
Advanced Temperature Management
If you must stain in less-than-ideal conditions, you can take measures to control the microclimate. Use misters to slightly cool the deck surface, work in smaller sections (4 square feet at a time), and use a stain conditioner that extends open time. Products like Flood's CWF-UV with UV stabilizers can improve workability in warm weather.
How to Apply Stain Without Lap Marks
Lap marks occur when you paint over a partially dried edge. The solution is simple: maintain a wet edge. This is particularly challenging on large decks, but with proper planning, it's achievable.
Step-by-Step to Avoid Lap Marks
- Work in small sections: Divide the deck into 2–3 board wide strips along the length.
- Apply continuously: From one end to the other without stopping mid-board.
- Keep a wet edge: Overlap each new brush stroke into the still-wet previous stroke.
- Use a stain additive: Some premium stains include extenders that slow drying, giving you more working time. Benjamin Moore's Arborcoat line (www.benjaminmoore.com) offers an extender additive.
In my experience staining hundreds of decks across Fremont and Pleasanton, the most common mistake is trying to cover too large an area before back-brushing. Eight square feet at a time is ideal. If you see the stain starting to get tacky before you finish a section, stop and move to a new area; you can't fix lap marks once they form.
Stain Types and Their Best Practices
Not all stains are created equal. The choice between transparent, semi-transparent, semi-solid, and solid stain affects application technique and longevity.
| Stain Type | UV Protection | Longevity (Years) | Ease of Application | Best For |
|---|---|---|---|---|
| Transparent | Low | 1–3 | Easy | New, naturally beautiful wood |
| Semi-Transparent | Moderate | 2–4 | Moderate | Slightly aged wood |
| Semi-Solid | High | 3–6 | Moderate | Previously stained wood |
| Solid | Highest | 5–10 | Easiest (like paint) | Weathered or damaged wood |
For Bay Area homes, where intense sun alternates with fog, semi-transparent or semi-solid stains offer the best balance. They allow the wood grain to show while providing robust UV protection. In coastal areas like Half Moon Bay, the higher moisture content demands a water-based formulation to resist mildew.
Oil-Based vs. Water-Based Stains
A common debate is oil-based versus water-based stains. Oil-based stains penetrate deeply and provide a warm, rich look, but they take longer to dry and have higher VOCs. Water-based stains (acrylic) dry faster, are low-odor, and offer excellent UV resistance. For decks exposed to heavy foot traffic, water-based solid stains are often the best choice due to their durability. According to a report by the Forest Products Laboratory (www.fpl.fs.fed.us), properly applied water-based stains can outlast oil-based equivalents by 2–3 years on horizontal surfaces.
Preparing for Long-Term Success: The 5-Step Prep Process
Preparation remains the cornerstone of any great finish. World Pro Painting's 5-step preparation process directly applies to staining:
- Power washing to remove dirt, mildew, and old stain.
- Scraping loose material.
- Sanding to open wood pores.
- Brightening with an oxalic acid cleaner to restore natural color.
- Cleaning residue before staining.
A survey by the National Association of Home Builders (www.nahb.org) indicates that proper surface preparation accounts for 80% of a coating's lifespan. Rushing prep is the surest way to waste your staining investment. For example, skipping the brightening step can cause the new stain to appear blotchy and uneven, even if application is perfect.
The Importance of Wood Moisture Content
Before staining, test the wood's moisture content. A moisture meter (available at hardware stores) should read below 15% for oil-based stains and below 12% for water-based stains. Staining wet wood traps moisture, leading to peeling and mildew growth. In the Bay Area, allow at least 48 hours after rain before power washing and another 24–48 hours of dry weather before staining.
Common Mistakes Even Experienced DIYers Make
1. Skipping the Brightener
After power washing, wood fibers can appear gray and fuzzy. A brightener neutralizes the alkaline residue and restores a receptive surface. Without it, stain adhesion drops significantly.
2. Over-Thinning the Stain
Some users add thinner to improve sprayability, but this reduces the solids content that forms the protective film. Follow the manufacturer's instructions exactly. Using a thinner that is not recommended can also cause the stain to fail prematurely.
3. Not Sealing the Edges
End-grain on cut boards (e.g., where a board meets a railing) absorbs far more stain than face grain. Apply a coat of stain to these edges before the main application to prevent blotchy absorption. Use a small brush to seal end-grain thoroughly.
4. Staining in Direct Sun
As noted earlier, direct sun causes rapid drying and lap marks. If you must stain in sun, work on a small section and keep a spray bottle with water mist to cool the surface slightly.
5. Forgetting to Stir Frequently
Pigments settle. Stir the stain every 10–15 minutes to maintain color consistency. Use a stir stick or a drill attachment with a paddle bit for thorough mixing.
6. Applying Too Thick a Coat
Thick coats of stain do not penetrate well and take forever to dry. Thin, even coats are better. For semi-transparent stains, one coat is usually sufficient; solid stains may need two thin coats.
7. Ignoring Deck Hardware
Staining over screws, nails, or metal brackets can cause rust spots and adhesion failure. Remove or mask hardware, or use a rust-inhibitive primer if it is too difficult to remove.
Real-World Example: A Fremont Homeowner's Deck Transformation
A client in the Glenmoor neighborhood of Fremont had a large redwood deck that had not been stained in seven years. The wood was gray, cracked, and had patchy remnants of old semi-transparent stain. We applied the hybrid method described above, using Benjamin Moore's Arborcoat semi-transparent stain in a warm cedar tone. The result was a uniform, rich color that revived the natural redwood grain.
The homeowner noted that the deck had never looked so good — and three years later, it still shows minimal fading, confirming the value of thorough prep and proper application. For similar results, explore our Investment in California Bay Area Painting to understand what goes into a quality finish.
Quantitative Results
We measured the stain's performance after 18 months: water beading remained excellent (>90% of the surface), color fading was less than 5% based on a spectrophotometer reading, and there was no peeling or flaking. This contrasts with a neighbor's deck stained with a budget product applied without back-brushing, which showed significant wear after just one year.
How to Troubleshoot Common Staining Problems
Even with the best preparation, problems can arise. Here’s how to fix them:
- Bubbles in stain: Usually caused by shaking the can vigorously or applying on a hot surface. Let the stain settle for 10 minutes after stirring, and apply in moderate temperatures.
- Uneven color: Caused by inadequate mixing or applying over a surface with previous partial stain removal. Apply a second coat after lightly sanding the faded areas.
- Sticky finish: High humidity or applying a second coat too soon. Allow extra drying time; if still tacky after 48 hours, apply a thin coat of sealant or wash with a mild detergent.
- Mildew growth: Common in shaded, damp decks. Clean with a mildewcide before restaining, and use a stain with added mildewcide.
Frequently Asked Questions
What temperature should it be to stain a deck?
The ideal temperature range for staining a deck is between 50°F and 90°F. Below 50°F, the stain becomes too thick to penetrate properly and will not cure correctly. Above 90°F, the solvent evaporates too quickly, leaving brush marks and causing the stain to dry before it bonds. Also, avoid staining if rain is expected within 24 hours.
Can I paint over a previously stained deck?
Yes, you can paint over a stained deck, but proper preparation is critical. First, test the existing stain by applying a small amount of mineral spirits. If the stain softens, it is oil-based and may require a bonding primer. If it does not soften, it is likely latex-based. In all cases, thorough cleaning, sanding, and priming are necessary to ensure adhesion. Solid stain or exterior paint works best for covering an existing stain.
How long should deck stain dry before applying a second coat?
Drying time depends on the stain type, temperature, and humidity. For oil-based semi-transparent stains, recoat after 4–6 hours at 70°F. Water-based stains often recoat in 2–4 hours. Always check the manufacturer's label. A good test is to touch the surface: if it feels dry to the touch but not tacky, you can apply the next coat. Never recoat before the stain is fully dry, or you risk peeling.
Which is better: oil-based or water-based deck stain?
Both have advantages. Oil-based stains penetrate deeply into wood fibers, providing excellent durability and a rich, warm look. They are ideal for rough-sawn or weathered wood. Water-based stains (also called acrylic) dry faster, have lower VOCs, and resist mildew better. They are easier to clean up. For Bay Area decks, we often recommend water-based semi-transparent stains for their UV resistance and low odor. However, for maximum penetration on old, dry wood, oil-based may perform better.
How often should I restain my deck?
Frequency depends on stain type and sun exposure. Transparent stains may need reapplication every 1–2 years. Semi-transparent lasts 2–4 years. Semi-solid and solid stains can go 4–6 years between coats. Inspect your deck annually: if water no longer beads on the surface, or if the color has faded significantly, it's time to restain. High-traffic areas like stairs and railings may need more frequent attention.
Can I stain a deck that was previously painted?
Yes, but it requires extra work. Remove as much of the old paint as possible through scraping and sanding. Use a paint stripper if necessary. Once bare wood is exposed, follow the same prep steps. However, some people prefer to repaint rather than stain over paint. If you decide to stain, use a solid stain that hides imperfections and provides a uniform color.
Do I need to seal the deck after staining?
Most stains already contain sealers that protect the wood from water damage. However, if you use a transparent stain or a stain with low UV protection, applying a clear sealant top coat can add extra years of life. Be sure to use a sealant compatible with your stain type (oil or water-based).
Should I use a brush, roller, or sprayer for deck staining?
For best results, use a combination. A sprayer covers large areas quickly, but you must immediately back-brush to work the stain into the wood. A brush alone is time-consuming but ensures deep penetration. A roller is fine for flat surfaces but misses gaps. The hybrid method (sprayer + back-brushing) is the industry standard for professional finishes.
Conclusion
Mastering deck staining best practices part 3 means caring about the details that most people skip: tool selection, weather timing, and meticulous technique. At World Pro Painting, we've applied these advanced methods across thousands of decks in the Bay Area, from Hayward to San Ramon, ensuring our clients enjoy beautiful, long-lasting finishes.
If you're ready to transform your deck with professional results backed by our 6-Year Guarantee, contact us today. For a deeper look at our process, visit the comprehensive guide on Deck Staining Best Practices Part 2.
Schedule your free on-site estimate at World Pro Painting and let our expert crews handle the heavy lifting — including the 5-step prep that makes all the difference.
Recommended Readings
To deepen your understanding of these topics, we recommend reading the following articles:
- Fence & Deck Staining Services
- Cabinet Refinishing & Painting
- Cabinet Refinishing Experts
- California Bay Area Painting
About the Author
World Pro Team is the painting experts at World Pro Painting. With years of hands-on experience staining decks across the California Bay Area, we bring science and artistry to every project, backed by a 6-Year Guarantee.
Commercial Painting Cost Calculator & Color Guide
Get an instant estimation checklist for painting your office, warehouse, or house. Learn how to choose colors that boost productivity.